IMPORTANT #1: You must be an Admin User to import contacts. If you only have the User role, you won't have the ability to import/export contacts.
IMPORTANT #2: Every contact record must have at least one phone number or email address for a successful import. Just listing names won’t work.
IMPORTANT #3: Contacts who share an email address and/or phone number will wreak all sorts of havoc on your database as JourneyCARE uses email and phone number as matching criteria. If you know your list contains people who share contact details, reach out to us at help@journeycare.team and we'll help you strategize a way to get a good import.
IMPORTANT #4: Your list must be in CSV format. Each contact should be on its own row. Columns going across should correspond with fields in your JourneyCARE database. NO merged fields, NO using multiple lines for the same contact, NO random notes inserted into the spreadsheet... just a simple CSV with rows and columns.
What You'll Need:
- A .csv file with the contacts you want to import
Step 1: Prepare Your .csv File
- Row 1 of the file should have essential headers such as ‘first name’, ‘last name’, ‘email’, ‘phone’, ‘additional phones’, ‘tag’, and so forth.
- When adding multiple phone numbers for a single contact, list the primary phone number in the phone column and the rest in the "additional phones" column. This feature allows you to manage multiple phone numbers seamlessly.
Step 2: Import Your Contacts
From the Contact list view, click the import icon (an upward-pointing arrow) to introduce contacts via your .csv file.
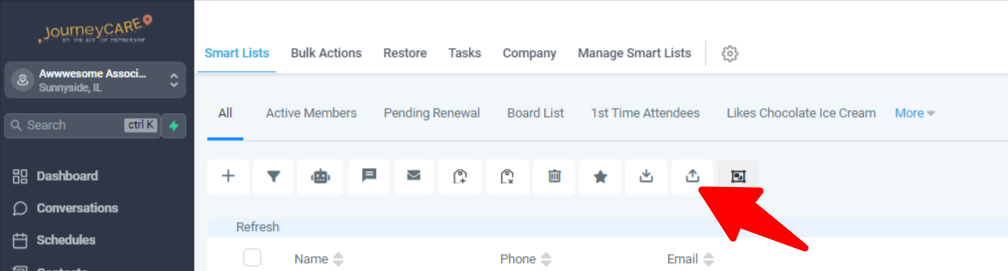
If the Import/Export icons are not visible, you do not have Admin User permission. Contact whoever is lead for your organization to have your permissions upgraded - or if you are the lead for your organization, contact our team at help@journeycare.team or use the live chat. We'll get you sorted.
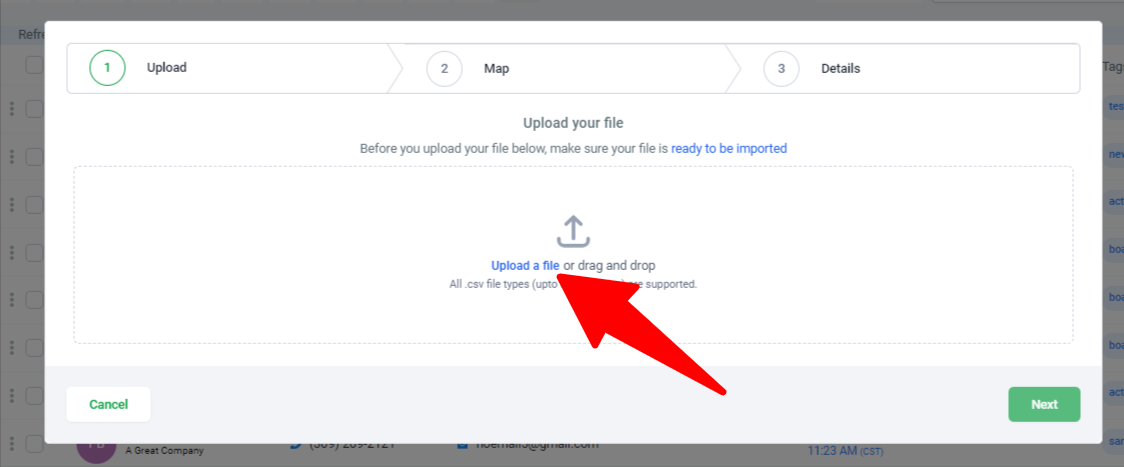
When the import screen appears:
- Click “Upload a file” or use drag-and-drop.
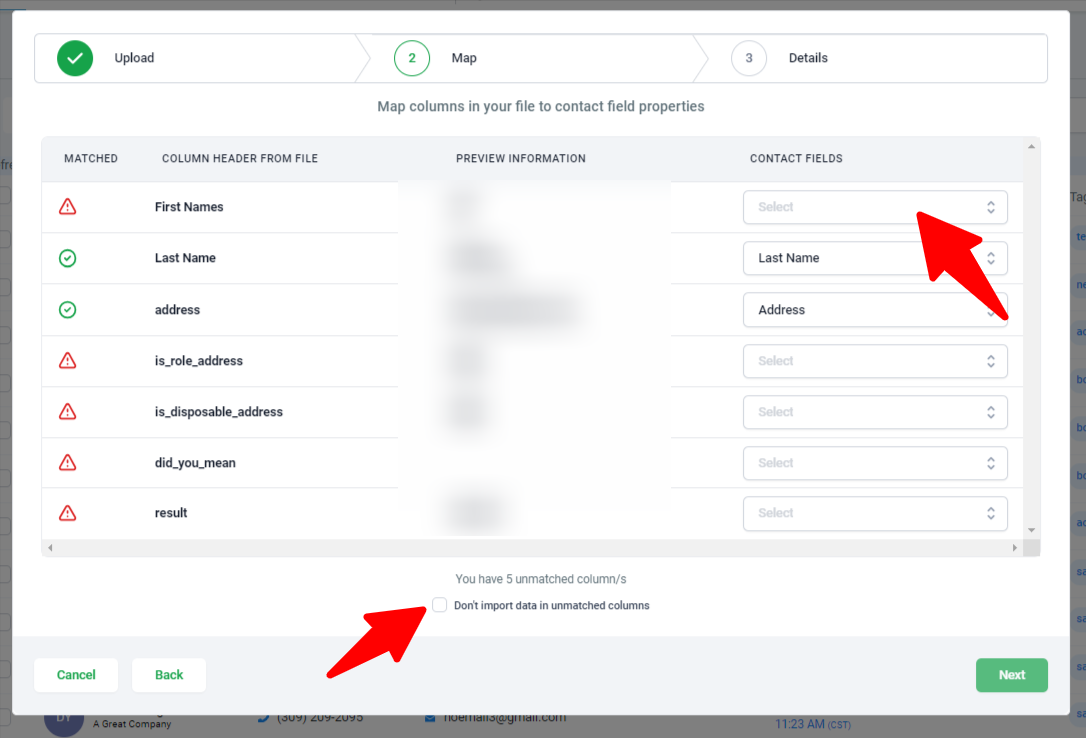
- Map fields to specify how the data will fit into ’s fields.
- A green check indicates a ready-to-import field.
- "Column Header From File" denotes which .csv column gets imported.
- "Contact Fields" indicates the target field in . Most general fields are automatically recognized. Manual mapping might be necessary for custom fields or unconventional headers.
- The "Additional Phones" column can be mapped for importing multiple phone numbers. Separate them using commas, slashes, or semicolons alongside the primary “Phone” number column.
- For multiple emails, separate them and map them to the "Additional Emails" field.
- Leave any fields that you don't want to match into JourneyCARE unselected from the dropdown. Click the "Don't import data in unmatched columns". Then click Next.
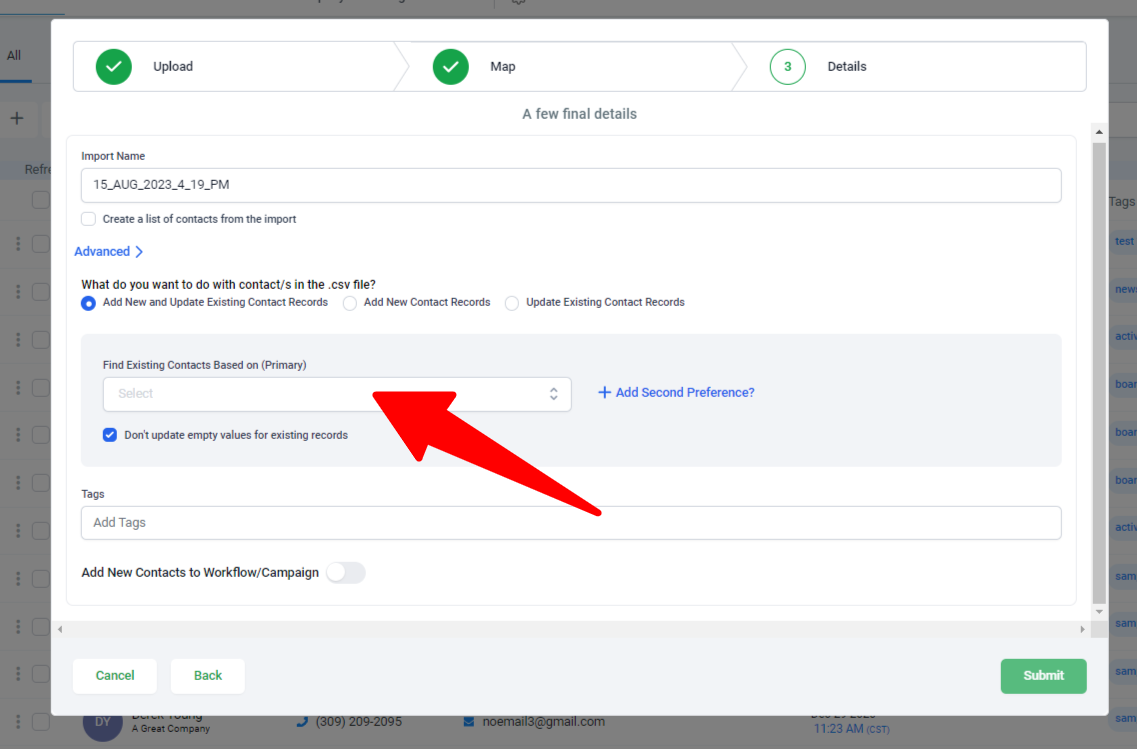
Proceed to tab 3:
- Assign an import name or let default to a date-time format.
- Opt to create a “Smart List” for these contacts, if desired.
- Be sure to open the “Advanced” tab so that you can:
- Decide on a strategy for duplicates.
- Add tags or decide the criteria for identifying duplicates.
- Activate the “Add to Workflow/Campaign” option if needed.
- Validate emails (charges might apply).
- Finalize by clicking 'Submit'.
Step 3: Validate the Import
- Refresh the Contacts page. Depending on the size of your import, it may take a few minutes to process.
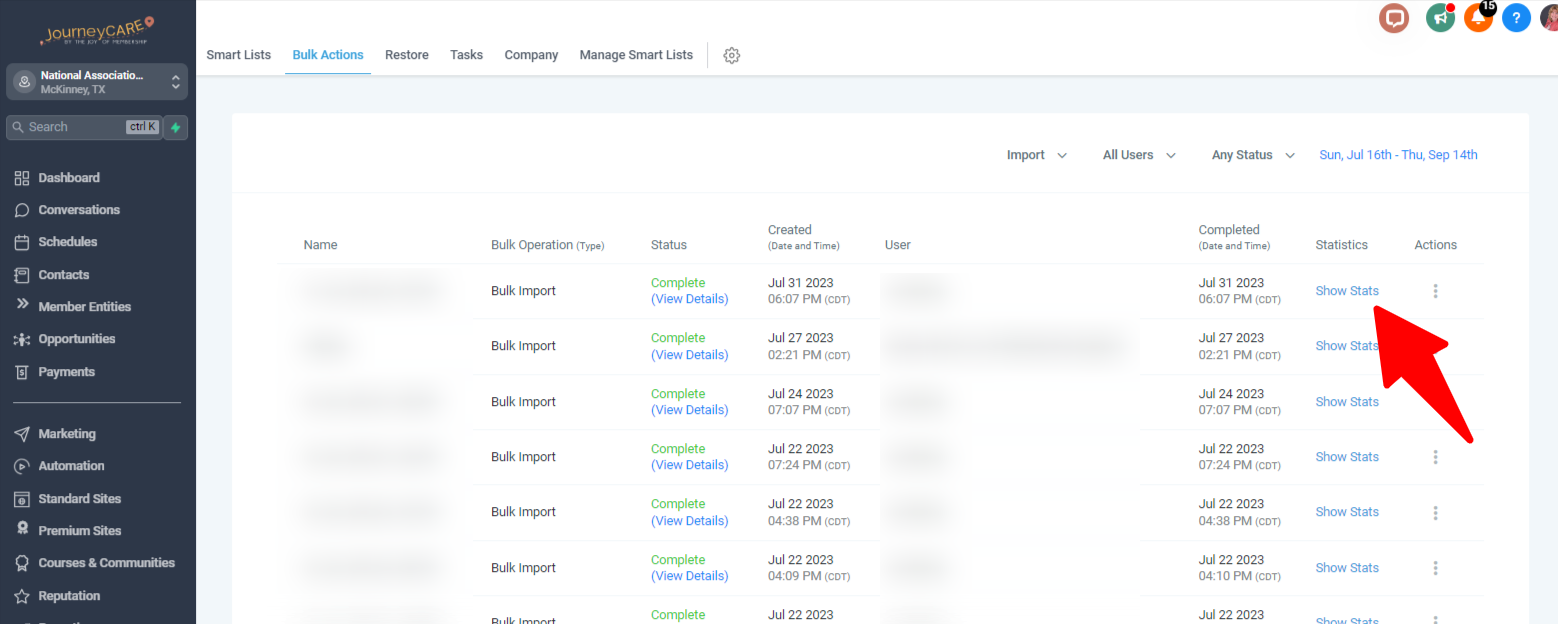
- Navigate to Contacts > Bulk Actions to verify the import's status and details.