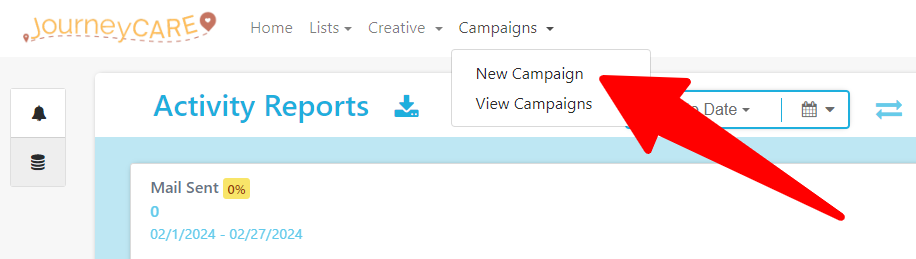
- Under Campaigns, choose "New Campaign".
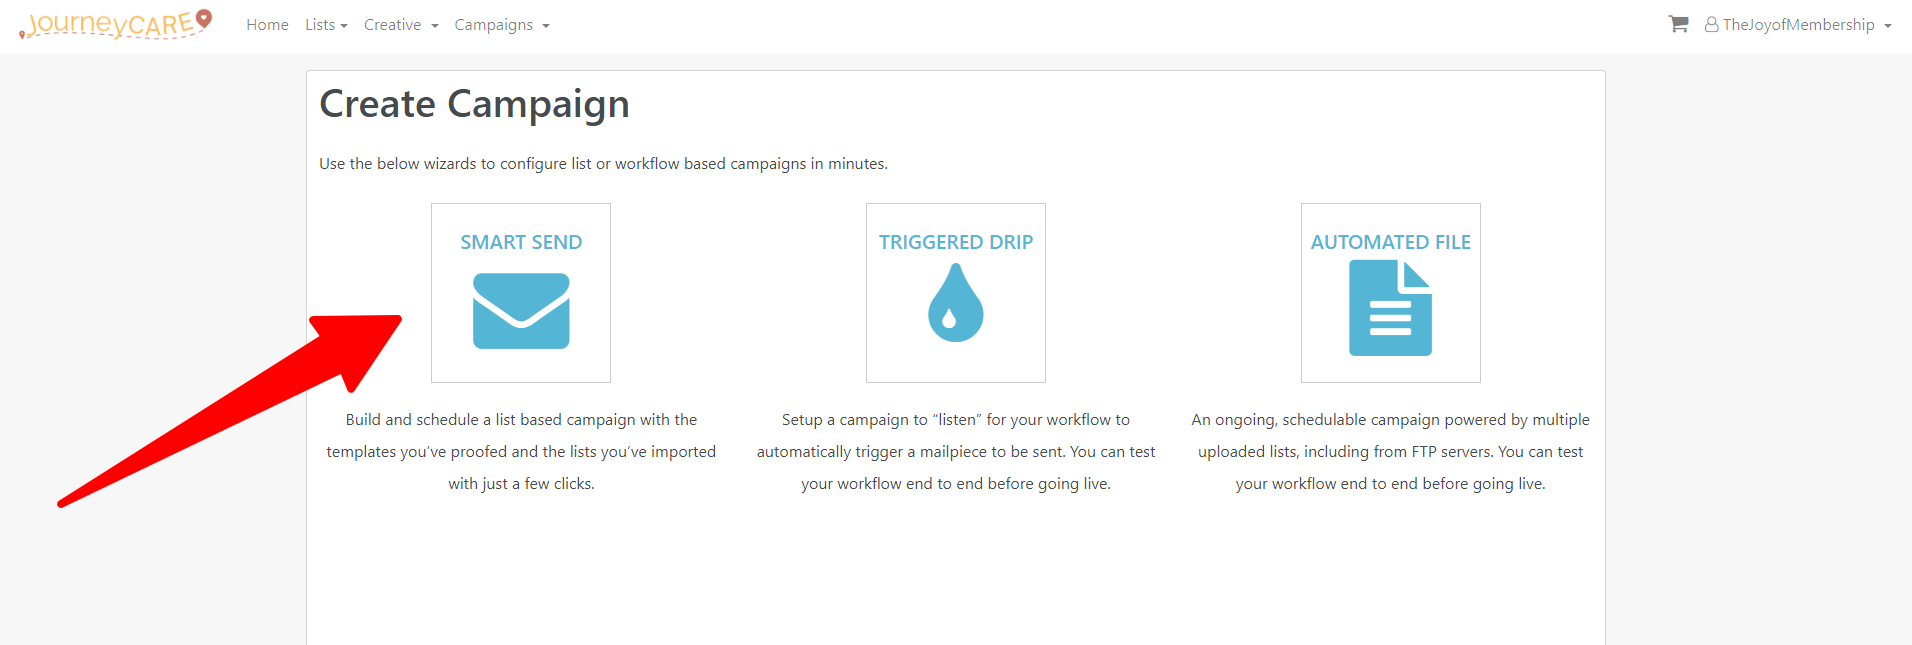
2. Then choose the "Smart Send" type.
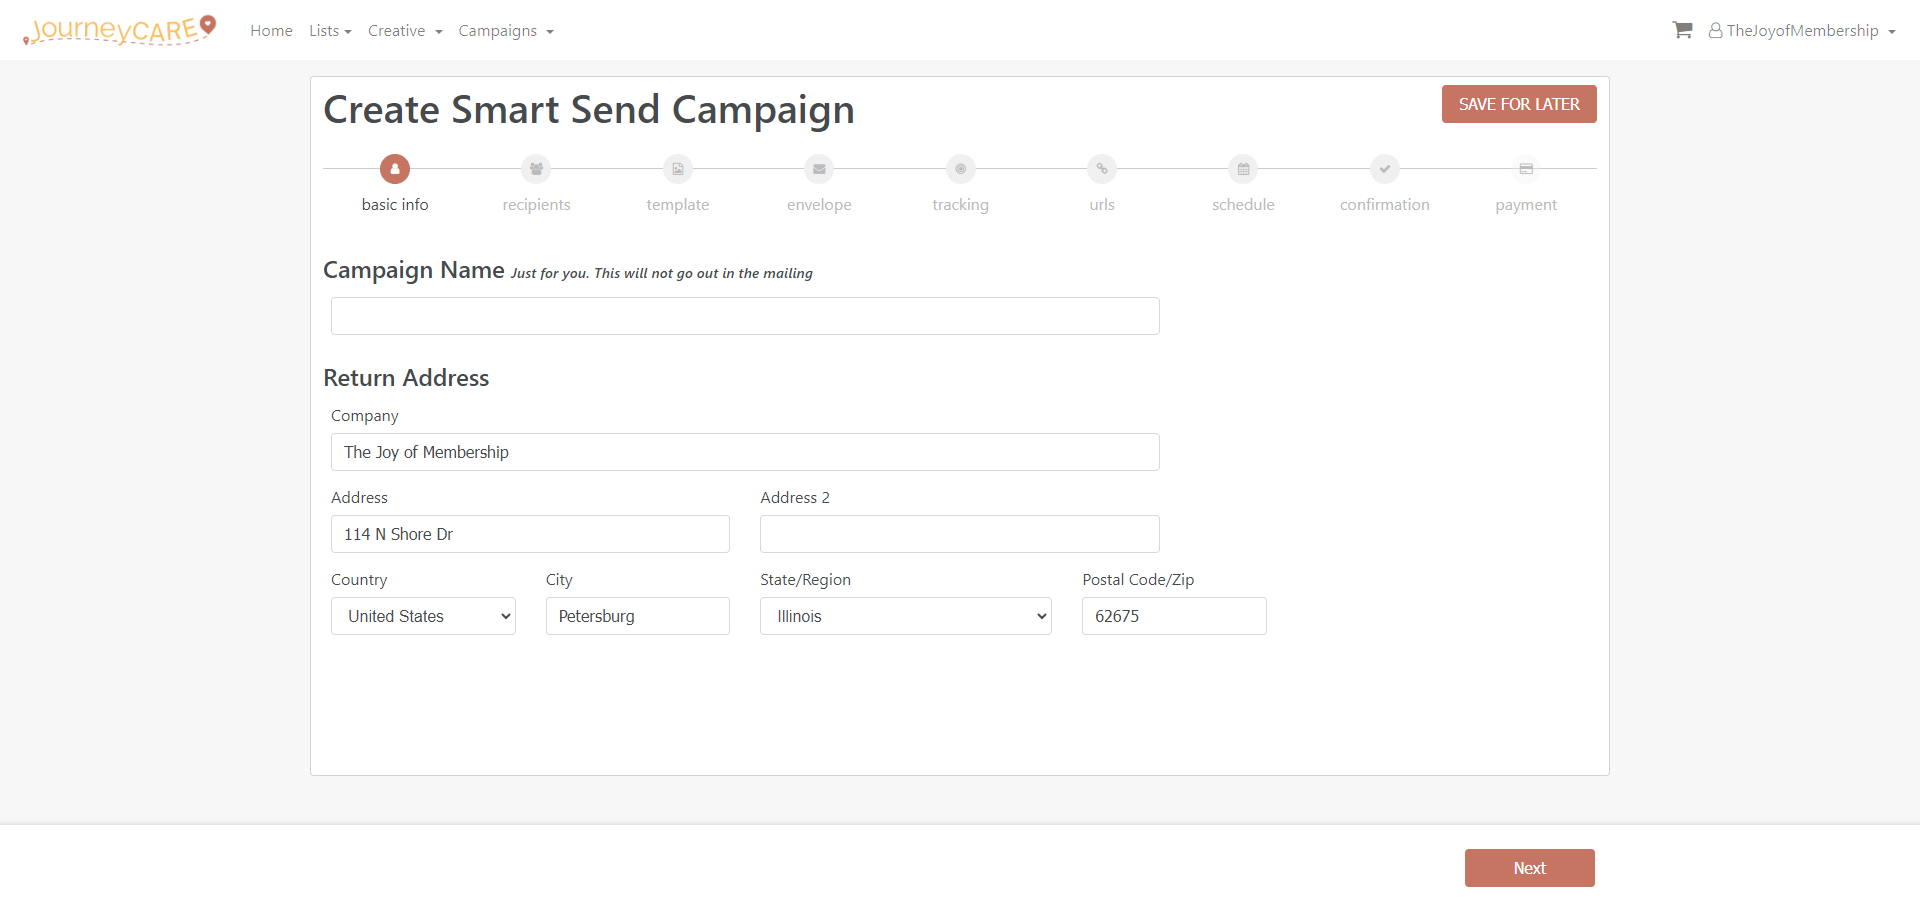
3. On the next screen, you will give the campaign a name e.g. 2024 Conference Save The Date and you'll designate the return address and click "Next" to proceed.
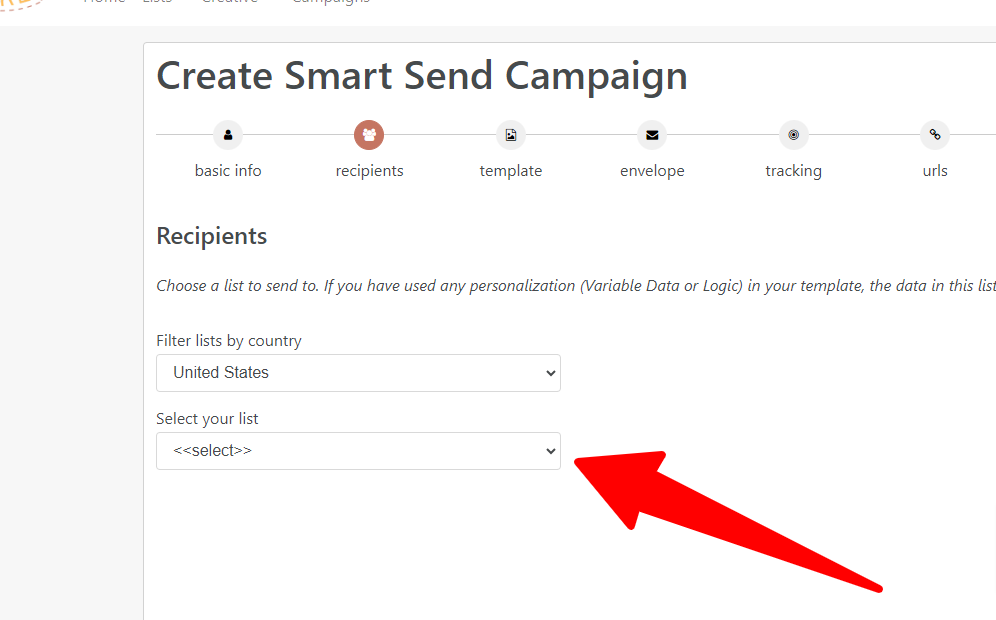
4. After you click "Next", you'll be able to choose one of your lists from the dropdown.
5. Choose which item you want to send.

6. If you're sending a Letter, it will ask you to select your envelope. If not, you'll skip over the envelope screen.
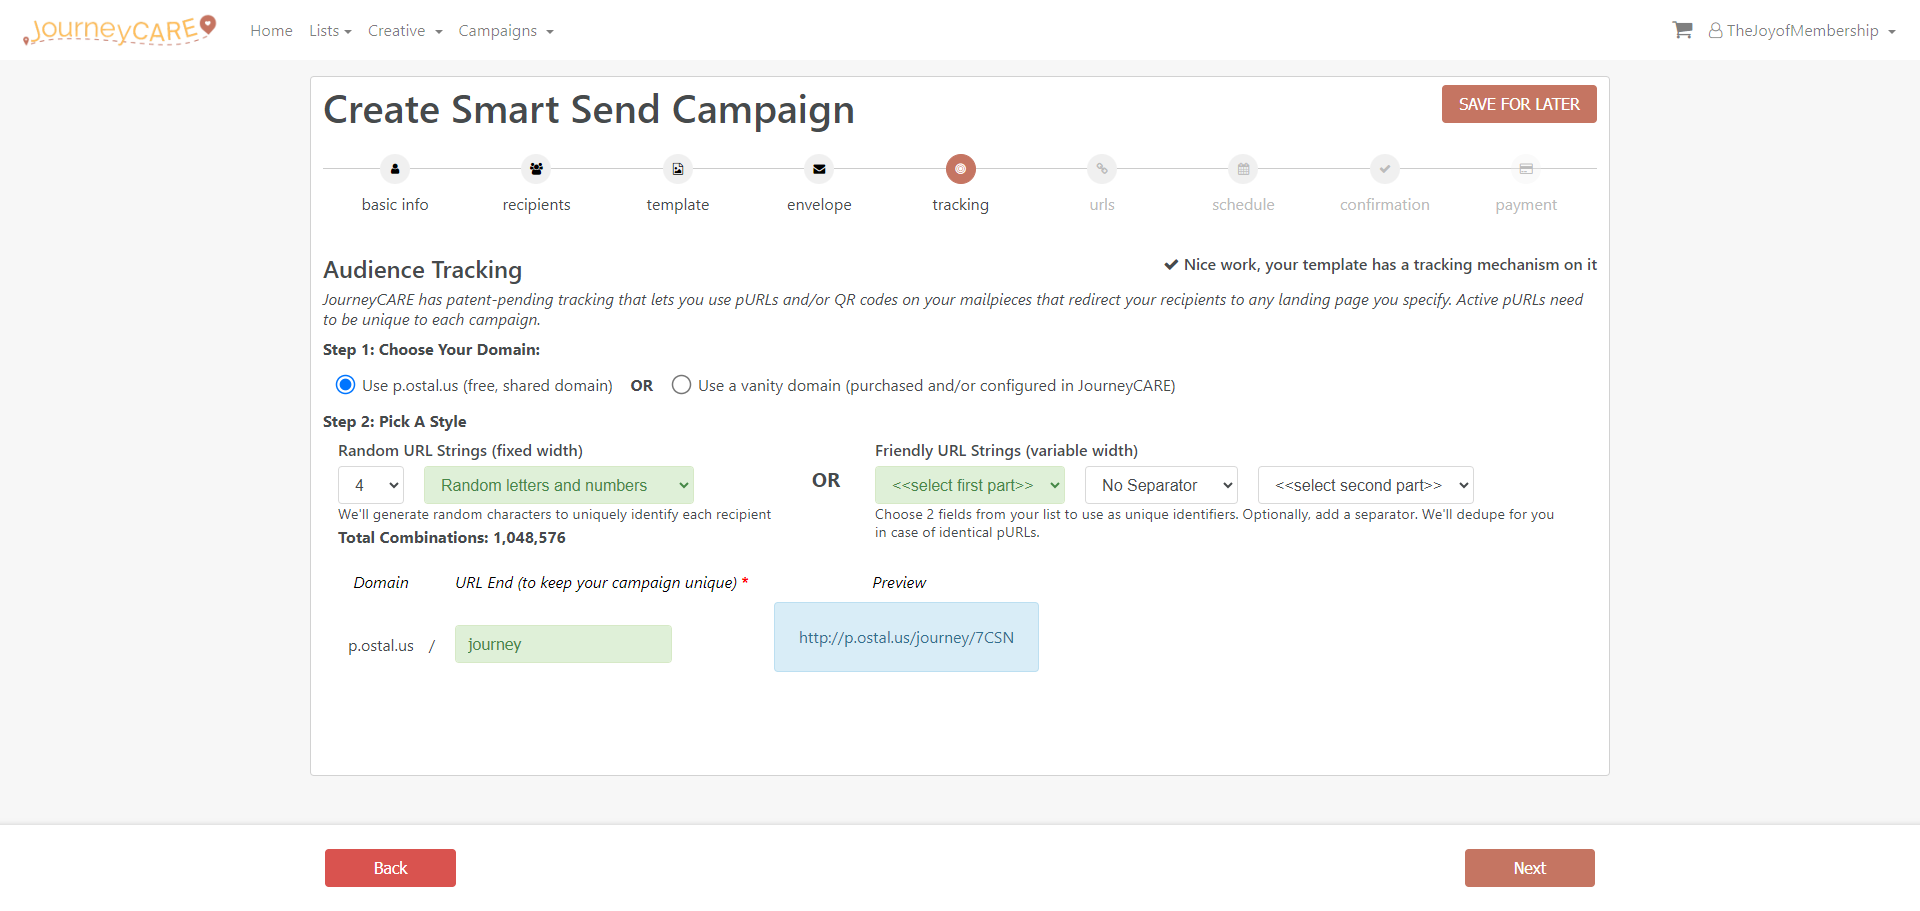
7. If you used a personalized url in your design, this is where you will designate what's used such as "p.ostal.us/joy.duling" or "p.ostal.us/duling2876.
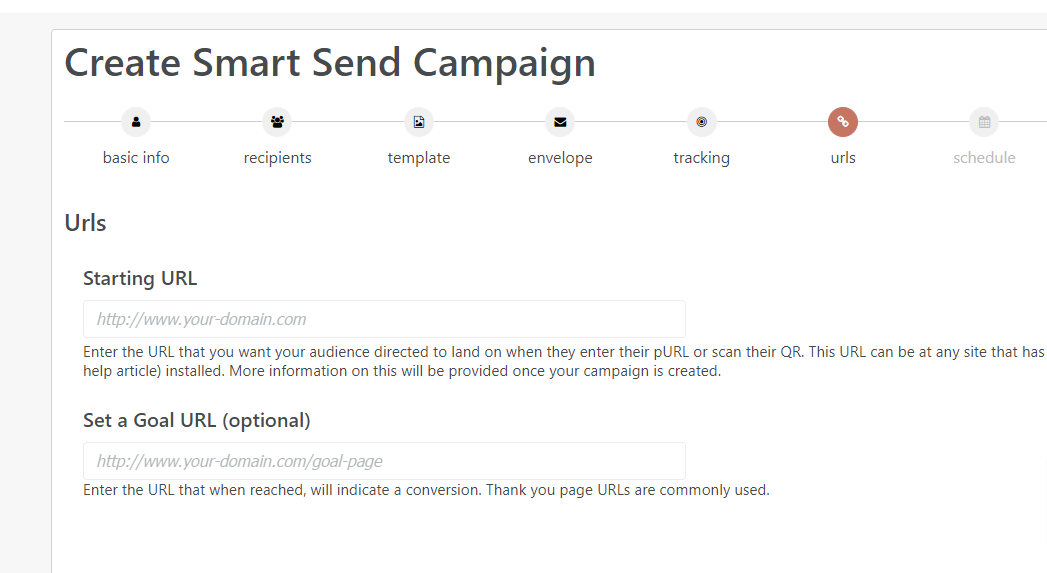
8. If you inserted a tracking QR code in your design, you'll set the designated url on the next screen. The starting url is where you want someone to initially go (like the sign up page or buy page).
Note that using the site visiting tracking option requires a small bit of code be placed on your website. If you need help with this, reach out to help@journeycare.team.
9. Next you will schedule your Campaign and confirm everything.
10. The final screen is where you will designate whether you are using credits that you've already pre-purchased or billing to a credit card. (Credits are what cover the cost of printing and postage.)
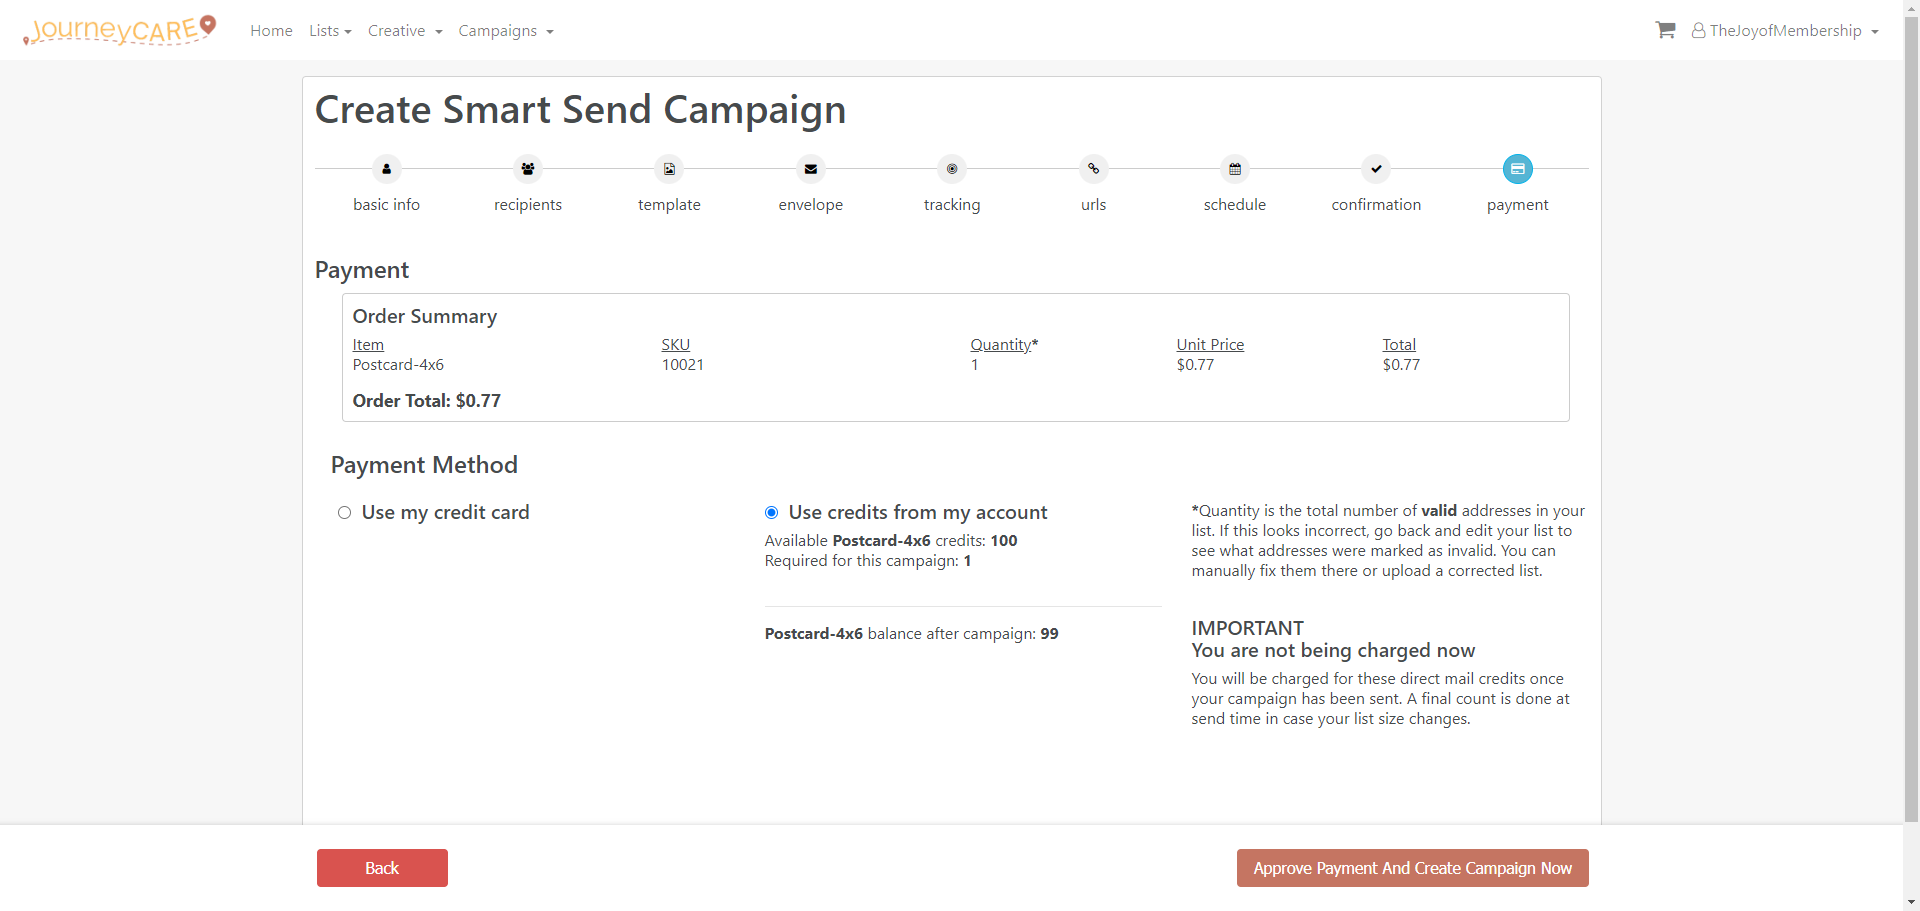
Once you click "Approve Payment & Create Campaign Now", there is NO STOPPING the mailing. It will go out using the parameters that you've set.