Think about events as 3 pieces that fit together.
- Set up the "tickets"
- Set up what happens after someone purchases a ticket
- Set up how the event looks on the calendar
This video explains all 3 pieces... and then below this video, you'll find step-by-step instructions.
PART 1: Create the "tickets"
If you're already using the built-in e-commerce application for other things, you can use it for event tickets as well (even if the event is free).
The easiest way to create a new ticket for purchase is to simply duplicate one that already exists. You could also start from scratch if you prefer.
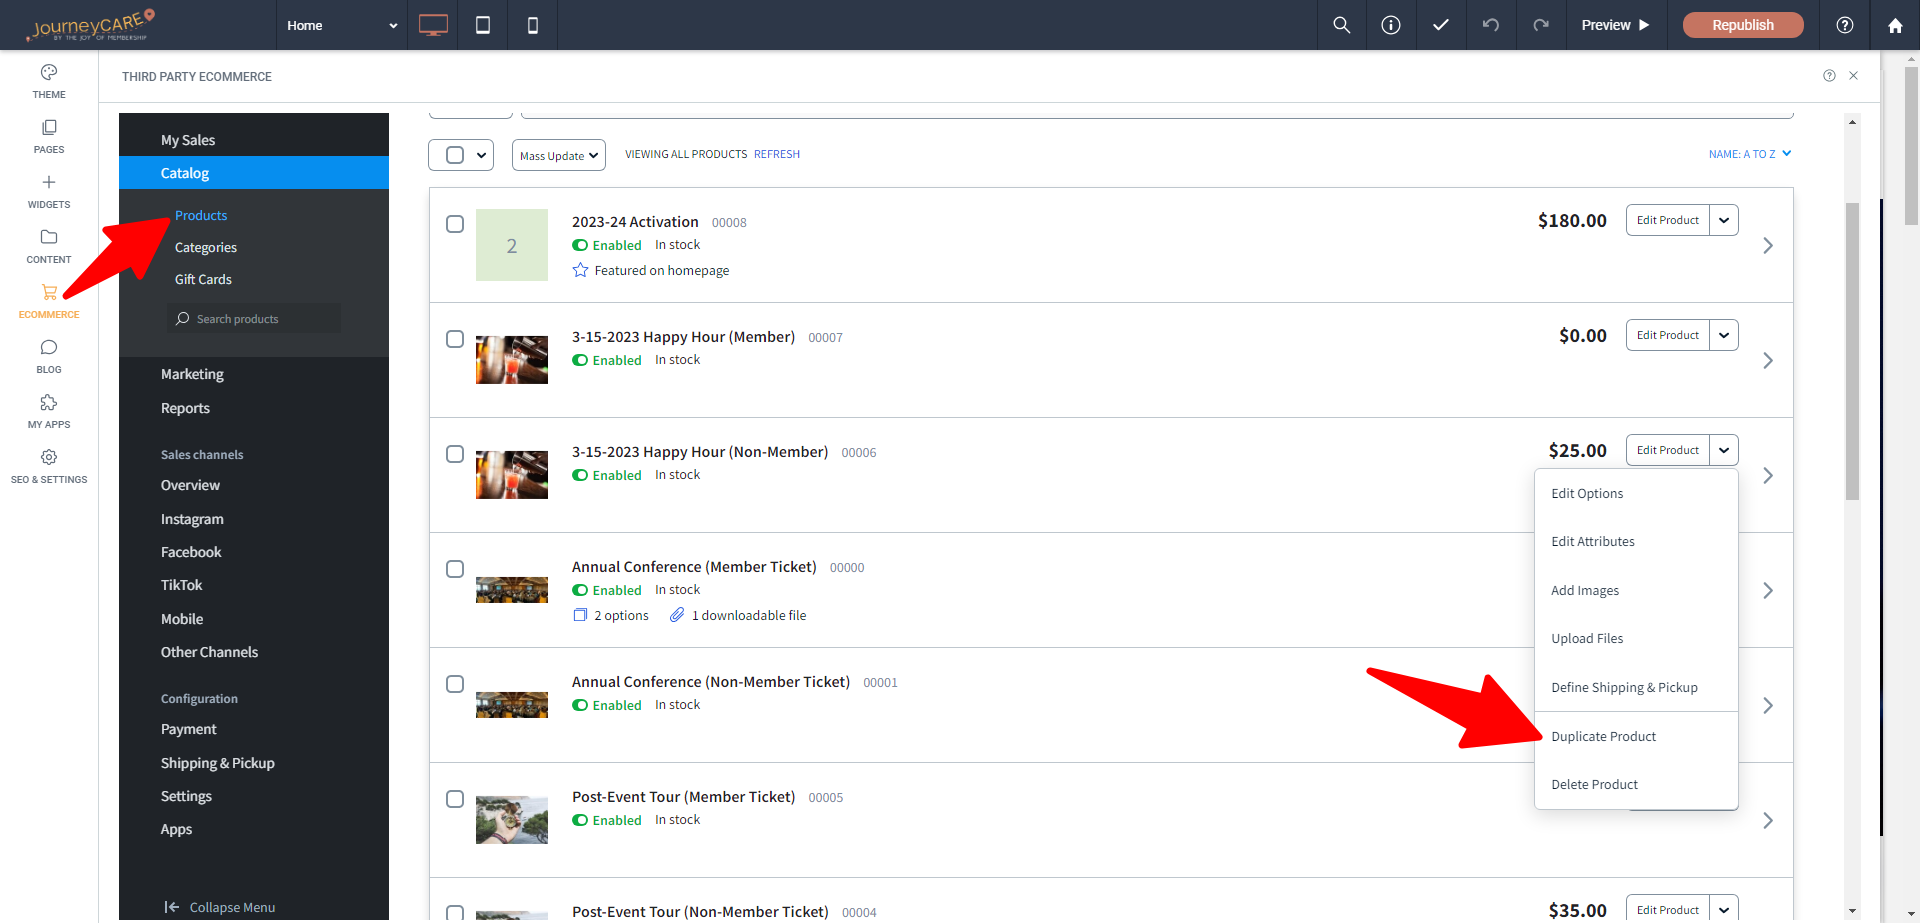
On the duplicated product, change the details to be for your new event.
WHATEVER YOU NAME THE PRODUCT will become a TAG in JourneyCARE when people purchase.
1. Do NOT use commas in the product name because it "breaks" the tag and your automation will not work.
2. Do NOT change the name of your product later because it will "change" the tag and your automation will not work.
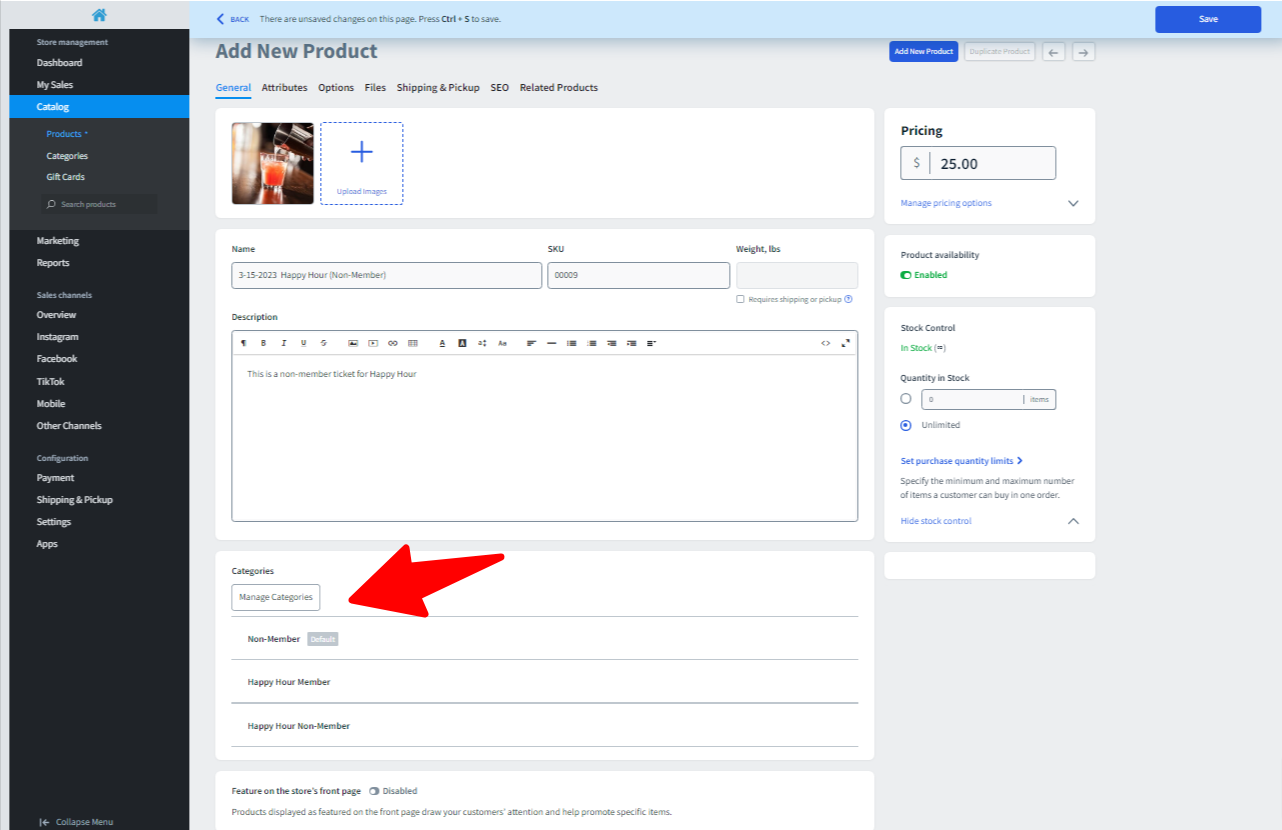
Note that you DO NOT have to put all of the descriptive information here in the ecommerce product. Just put a little blurb. You'll put all of the details on the calendar, so there's need to have it here.
The categories that you choose determines which page(s) the product will show up on for your site.
You will repeat this process for as many different registration types as you are going to need for this event.
If you need to ask any questions for specific ticket types, you can add those under "Options".
Part 2: Set what happens after someone purchases a ticket
For this part, you'll go into your JourneyCARE database and go to the Automations section.
Again, it is always easiest to start by copying a previous event workflow and then editing, but you can start from scratch if you need to do so.
You're going to edit 3 things in the copied workflow:
- change the trigger (screenshot red arrow) so that it's set to this event
- change the workflow the date/time of the event (screenshot blue arrow)
- change any emails to include any relevant details such as zoom link, description, special instructions, etc. (screenshot green arrows)
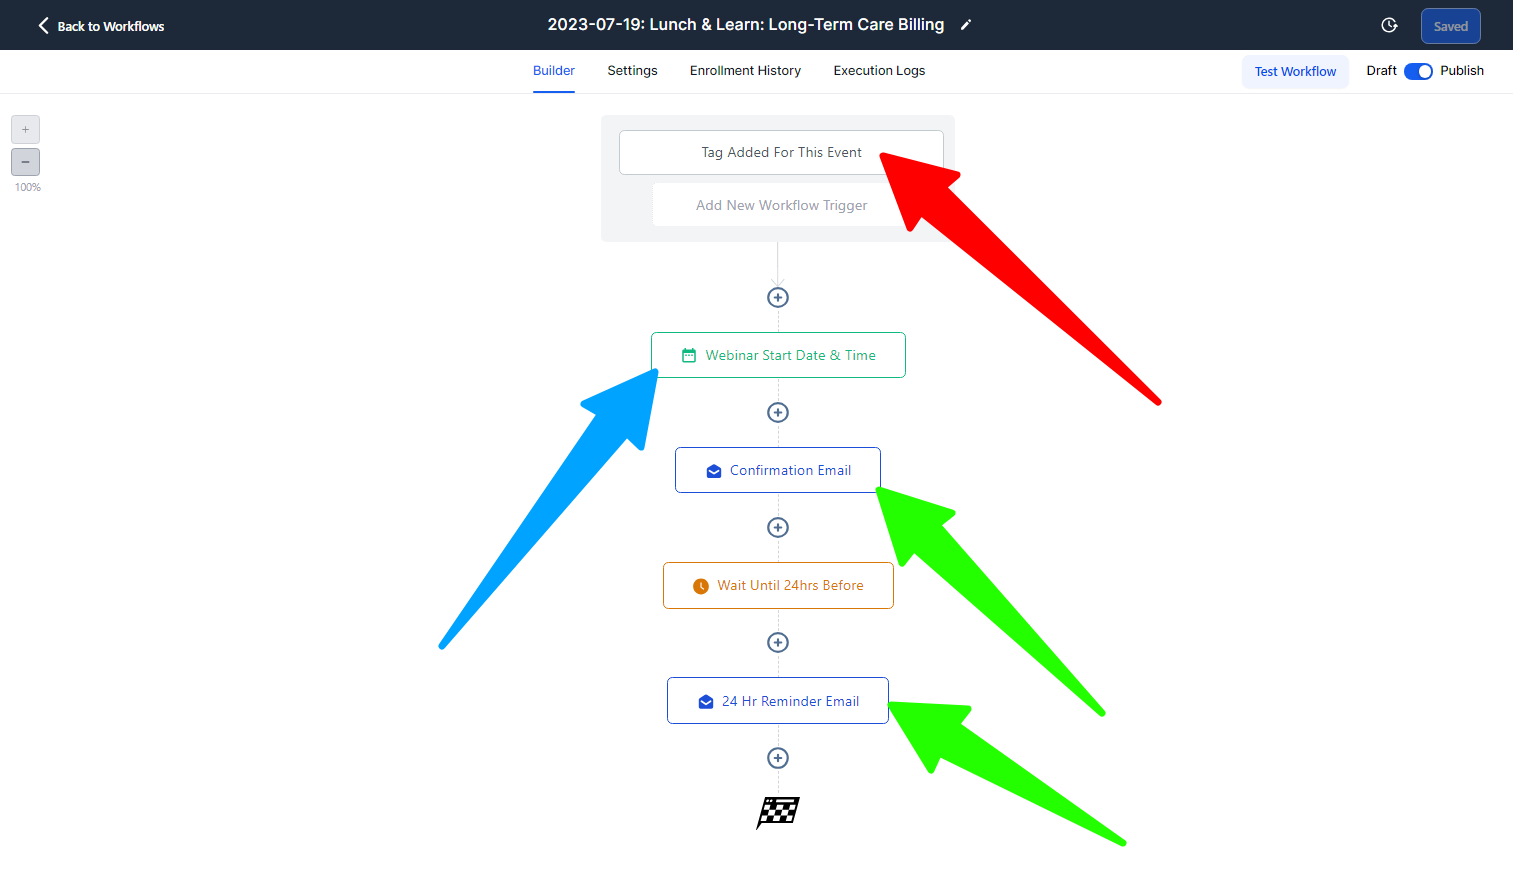
TRIGGER:
Your trigger at the top of this workflow should be set so that it's kicking off when a tag is added that is the EXACT name of the product that you set up because JourneyCARE is going to automatically give that tag to each person who buys.
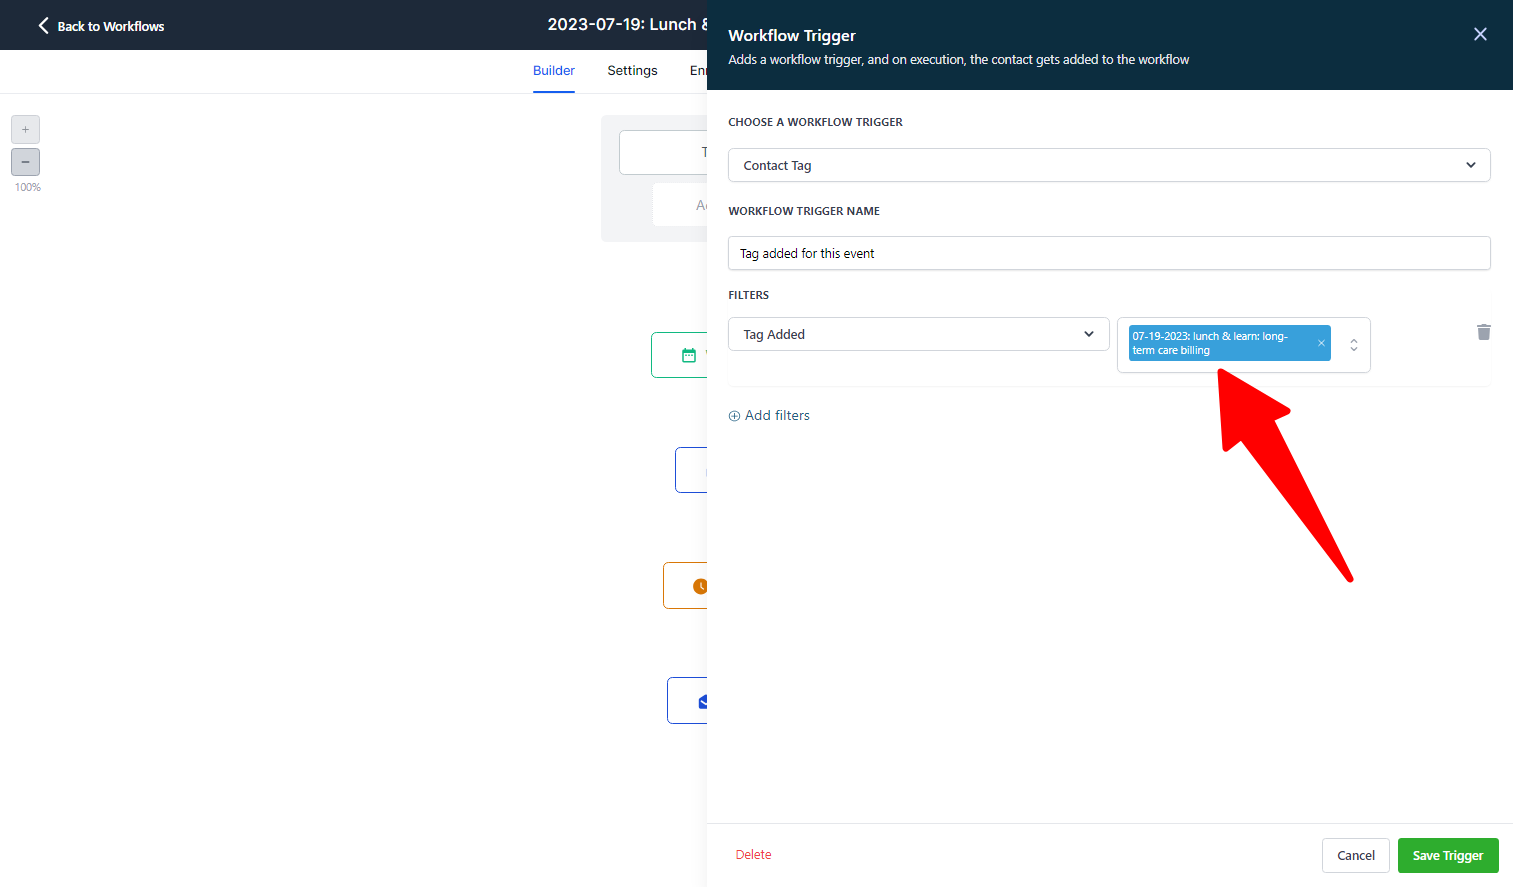
If you have multiple ticket types, create a trigger that corresponds to each of them.
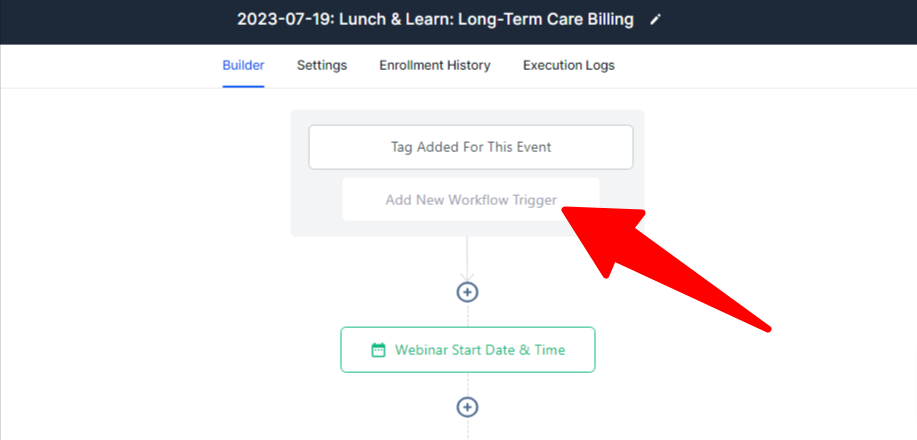
ACTION: EVENT START DATE
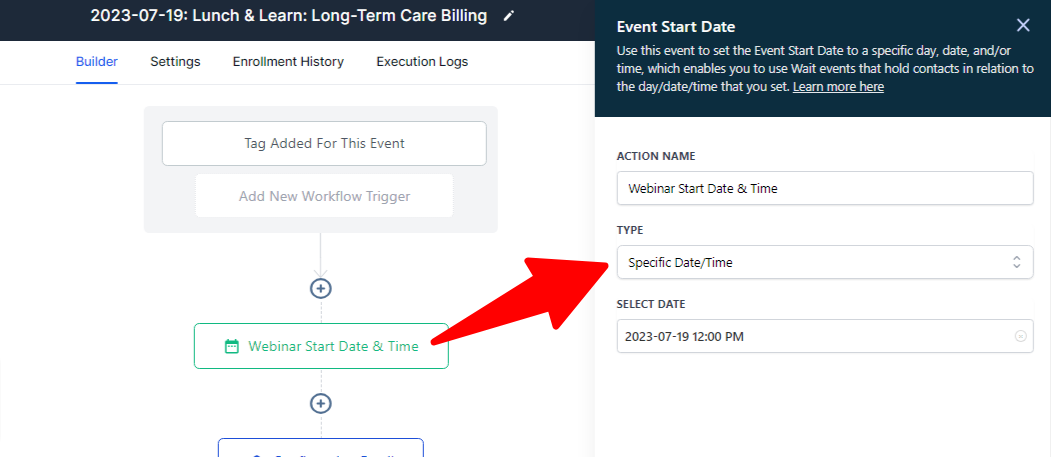
The first action at the top of the workflow should be "Event Start Date". Make sure it's using the type "Specific Date/Time" and put in the date/time for this event.
ACTION: SEND EMAIL
We recommend sending a confirmation email immediately so that should be your next Action. If you've duplicated the workflow from a previous one, you'll want to make sure that any emails have the correct details for this specific event. Be sure to include a Zoom link or any other instructions that the attendee needs.
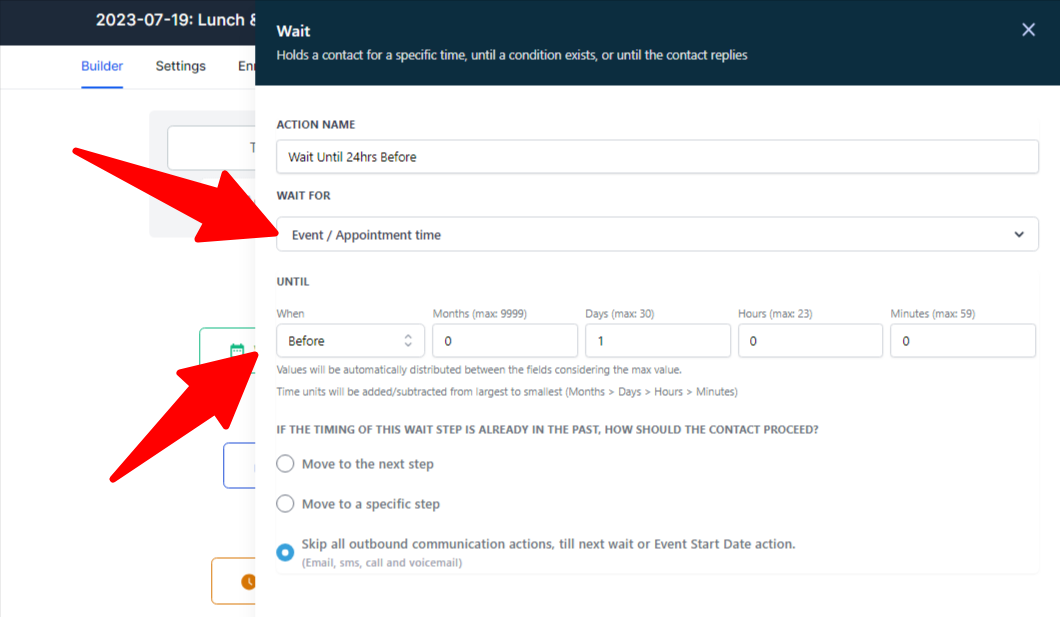
ACTION: WAIT STEP
All other actions are things that you'll probably want to base around the date/time that you set above. So when you put in a Wait Step, be sure that you set it to "Wait for Event / Appointment Time"... and then you can set the exact timing as Before, Exact Time, or After.
In this example, we have the Wait Step holding until 1 day before the event day/time.
Part 3: Show the event on your Calendar
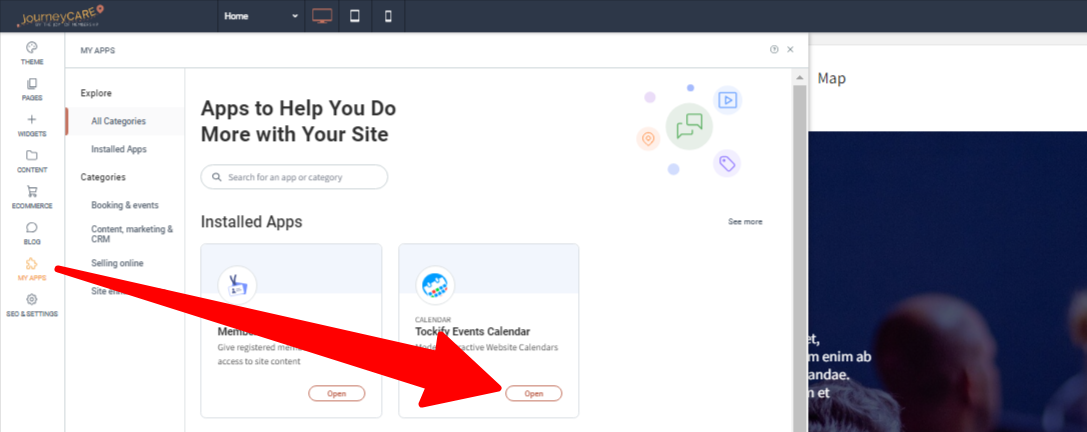
If you are using the built-in Tockify app to show a calendar on your website, you'll do this final piece in the Site Editor. Select "My Apps", then open the Tockify Event Calendar.
When Tockify opens, you'll see all of your Events listed. You can either hit the "Create Event" button to start from scratch. Or click the edit button on an Existing Event if you want to copy one.
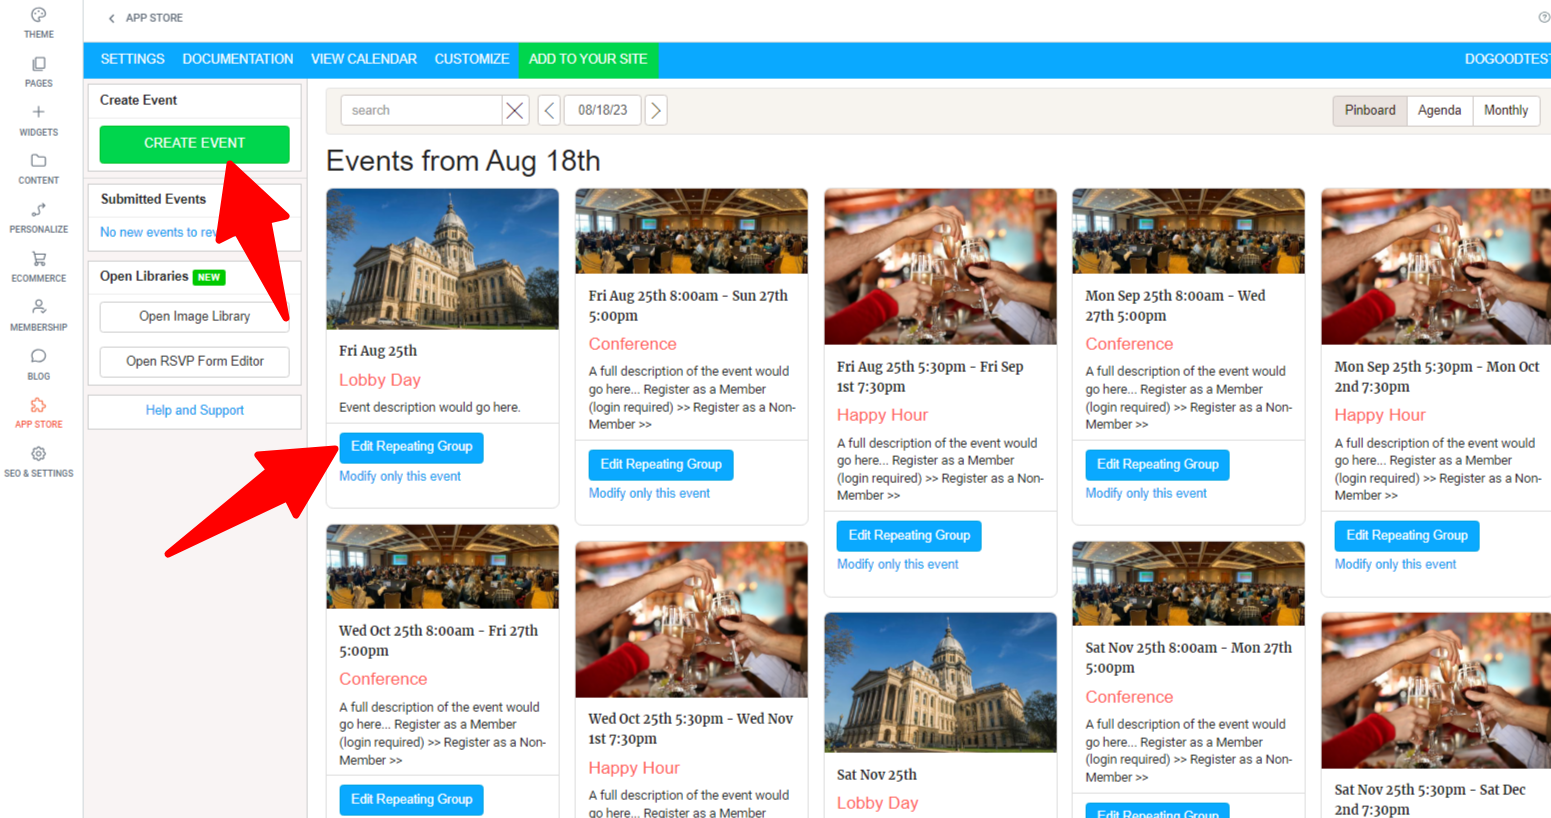
To copy, when the event is open, you'll see "Copy" as an option.
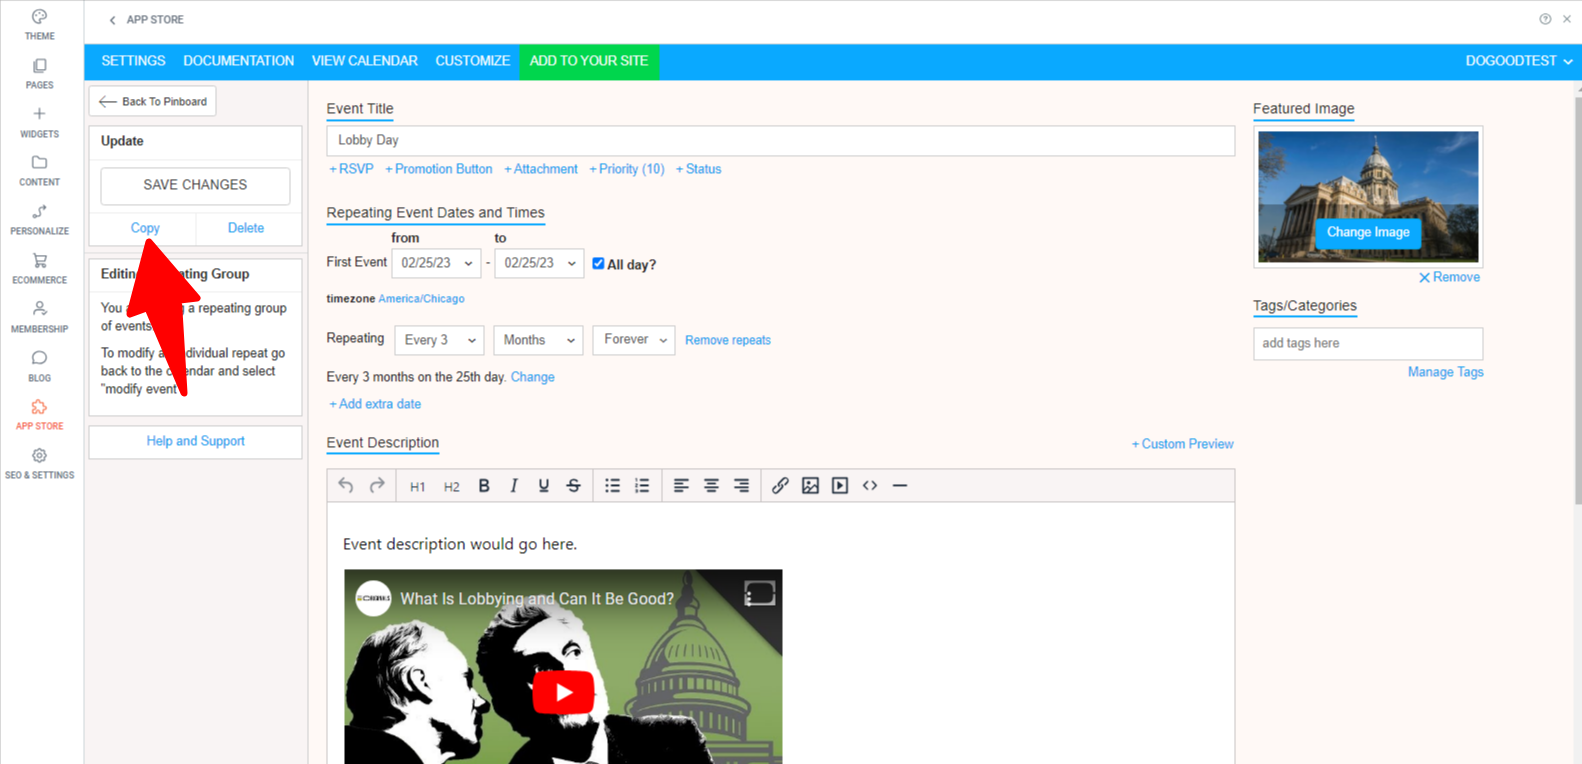
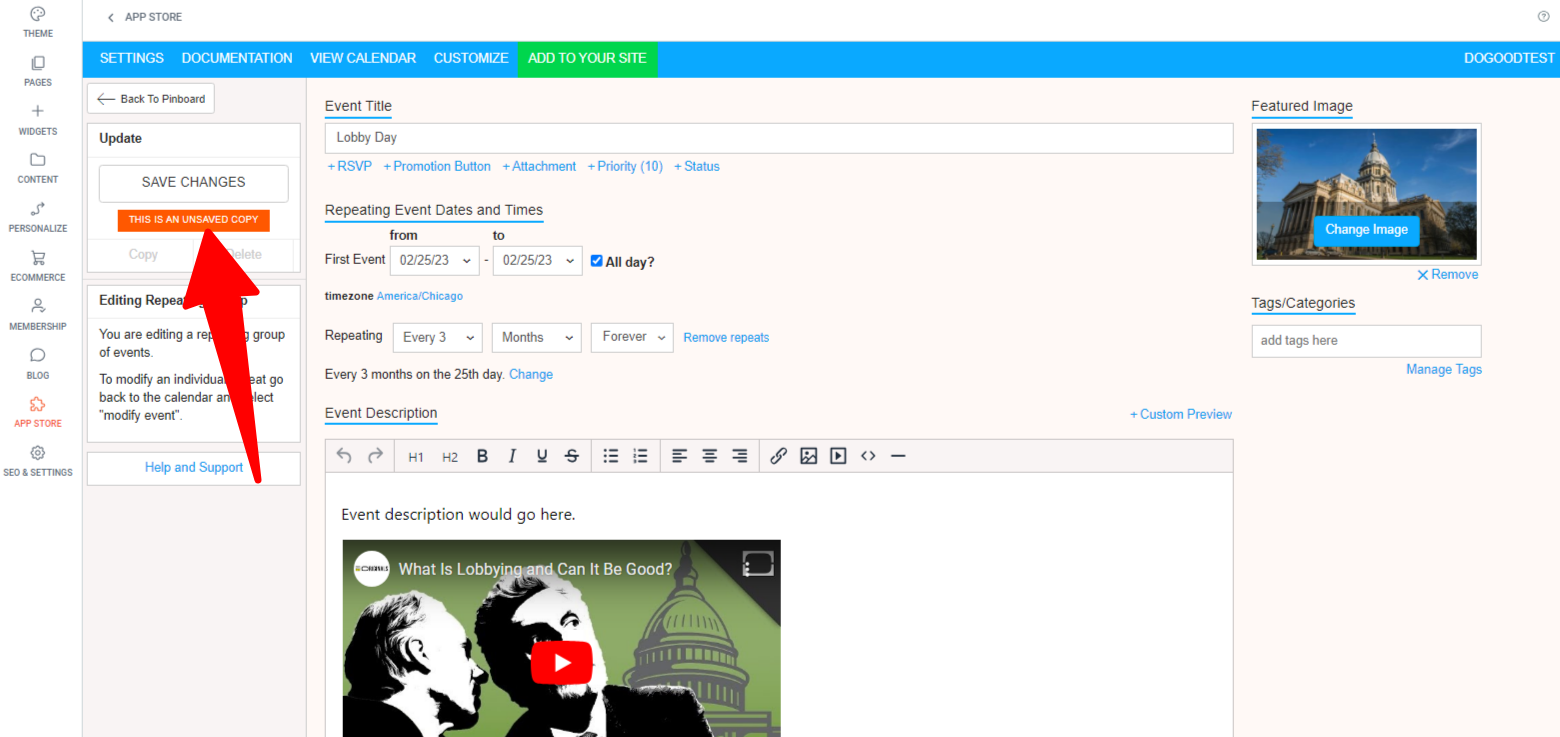
After you click Copy, the screen will change to the copied version. You'll know you're on the copy because there will be an orange message that says "This is an Unsaved Copy".
DO NOT USE THE RSVP LINK.
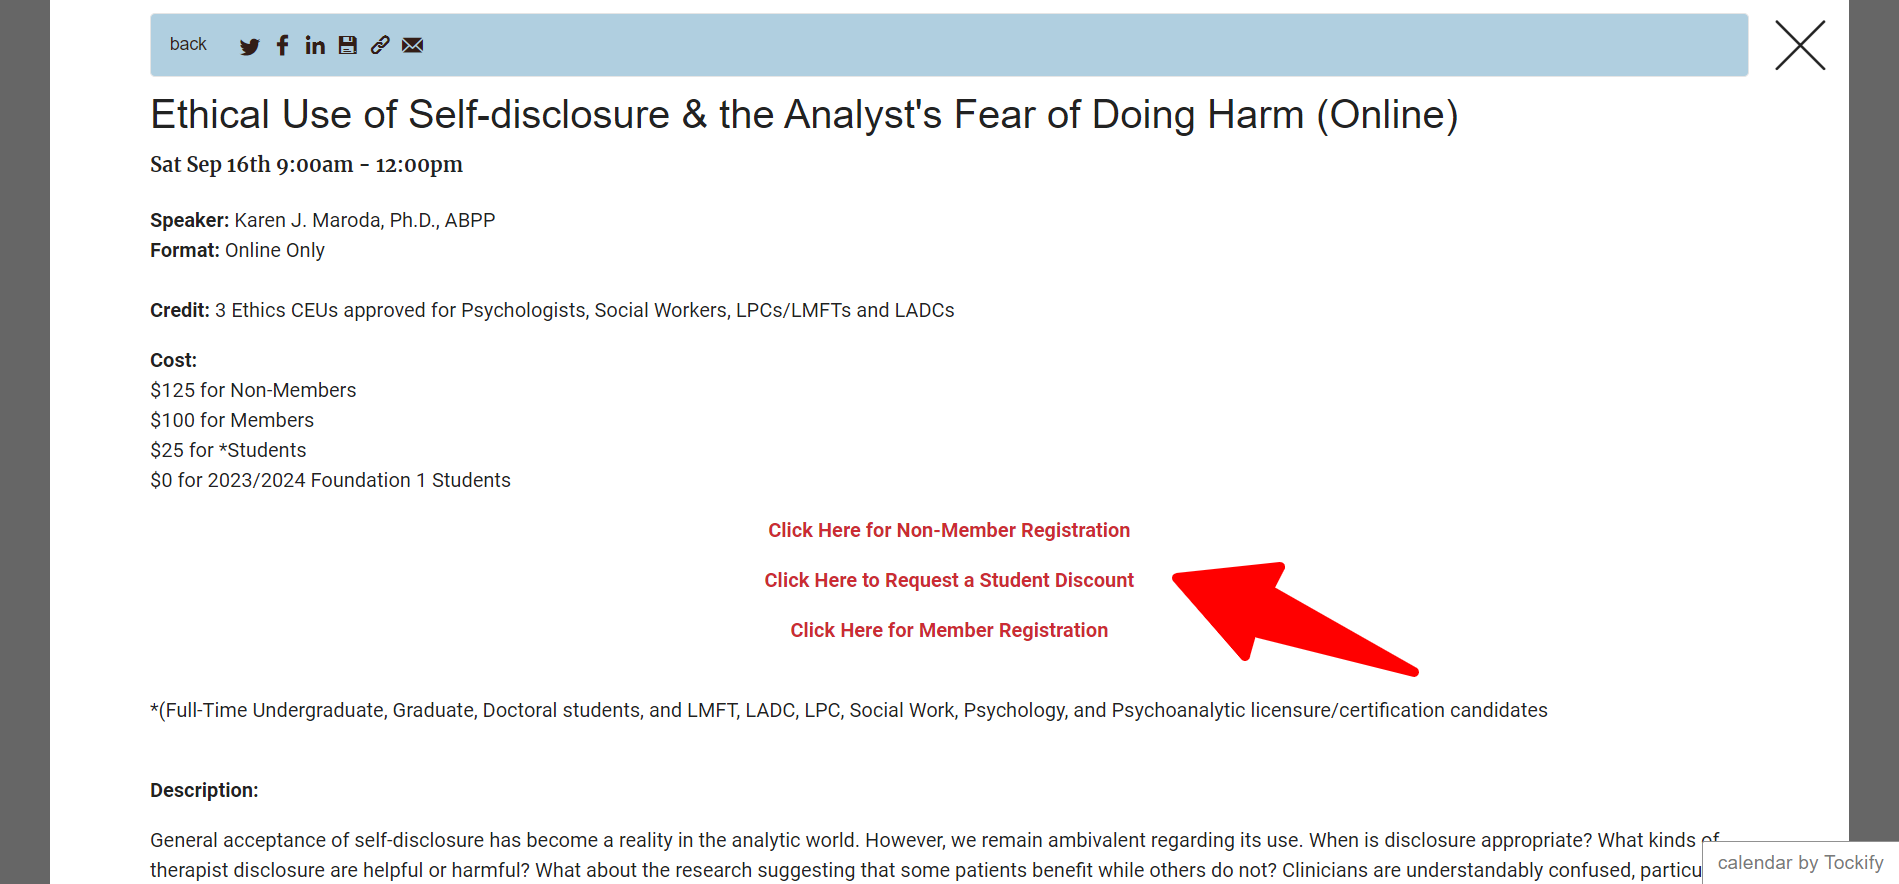
Instead, if you have only one ticket type, you can use the "Promotion Button" to send people to the product to buy... OR if you have multiple ticket options, put the links to the different tickets in the body of the event description.