Smart Lists are a great way to organize contacts, by customizing filters to create 'lists' or categories of contacts.
You may use as many filters as you like, completely customizing your lists to exactly what you need... and then you can save the list for easy access in the future.
You can keep it simple with one filter, for example - any contact with a City of "Chicago", OR any contact with an "active" tag.
Or, you may also choose to add multiple filters, such as contacts with an active or pending renewal tag... AND no activity in the last 60 days... and a City of "Chicago". The more filters you add, the more specific a list will be.
When you've saved a list, it will always show you the contacts who meet the list criteria at any time you look at the list... so if you look at your Smart List today, it will show you the people who meet the criteria today... if you look at it tomorrow, it will show you who meets the criteria tomorrow... etc.
Follow these steps to learn how to create, edit, and use Smart Lists.
To create a Smart List...
- Navigate to Contacts > Contacts/Smart Lists.
- Click More Filters

- Choose one or more filters from the list that pops out from the right side of the screen.
- You may search for a filter, or scroll through the list (which is categorized in different sections, beginning with “Most Used” at the top).

- When you click into a filter, fill out the appropriate information as requested.
- In this example, we’ve selected “Business Name” and filtered by “is not empty” so the filter will find anyone with any Business Name in that field.
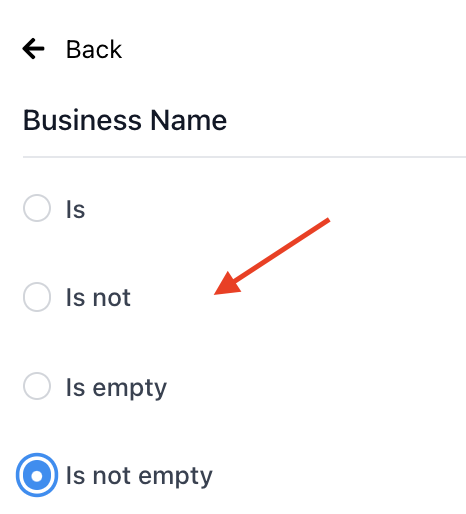
- Click “Apply” to save your filter.

- On the next screen, you may edit or delete the filter, using the icons.
- You may also add one or more additional filters. Click “AND” to add another filter.
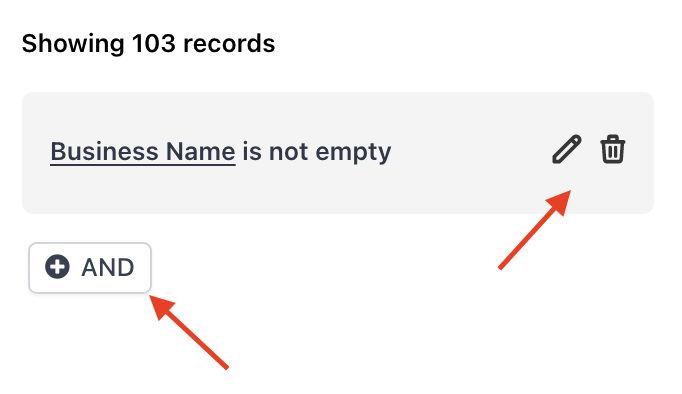
- As you add filters, you can see them ‘building’ as a list on the right side of the screen in the filter window. This gives you a preview of how the filters are set up.

- In the bottom of the window, click “Save as smart list” to save the filter(s) as a permanent list in . (You can always edit or delete this list later.)

How to See a Smart List You've Previously Saved...
- Within the Contacts section of , the default view is "All".
- Click the name of a Smart List at the top, to view that tab / Smart List.

Step 2: Editing and Duplicating Your Existing Smart Lists
- Click into an existing Smart List
- The filters that are saved for that Smart List will appear on the right hand side.
- Click the trash can icon (Option A) or X (Option B) to delete a filter.
- Click the pencil icon (Option A) or dropdown arrow (Option B) to edit a filter.
- Then, click the Save icon to save your changes, the + icon to save the changes as a new list, or the undo arrow to undo any unsaved actions you just did.
Step 3: Smart List Settings
- Navigate to "Manage Smart Lists" in the top right of the Contacts page.
- Here you'll see a list of your Smart Lists.
- You can copy, share, edit the name, or delete a Smart List using the icons on the right.
